
by Joyce Conner
The following idea was entirely conceived and designed by Joyce Conner, member of the Texas Master Naturalist program. She has given these “crystals” away at nature events and classes since 2013.

Every winter when my brother and his wife come to Texas to escape the cold and snow in Wisconsin, we women typically do several craft projects. When there is a large enough supply of empty aromatic scent bottles (typically Wallflowers from Bath and Body Works), we make “crystal” hangers to give away.
My sister-in-law Suzy Coose is the talented person. She is in charge of painting dragonflies, birds, flowers, and butterflies on the empty bottles. My grandkids and I usually are her helpers for everything else. This winter Phyllis Shuffield had collected many, many bottles for us, so we got to work getting them ready for 2019 Earth Day give-aways.
The following are instructions, in case you would like to make your own hanging “crystals.” (Since I can’t find my pictures I took this year, I have included some from past years.)
Instructions for reusing scent bottles:
- Remove the cap and set it aside. You will eventually want to make a hanger for the bottle, and it is easiest to use the cap that has had a ribbon strung through it. If you no longer have a cap, make a string or wire hanger for the bottle.
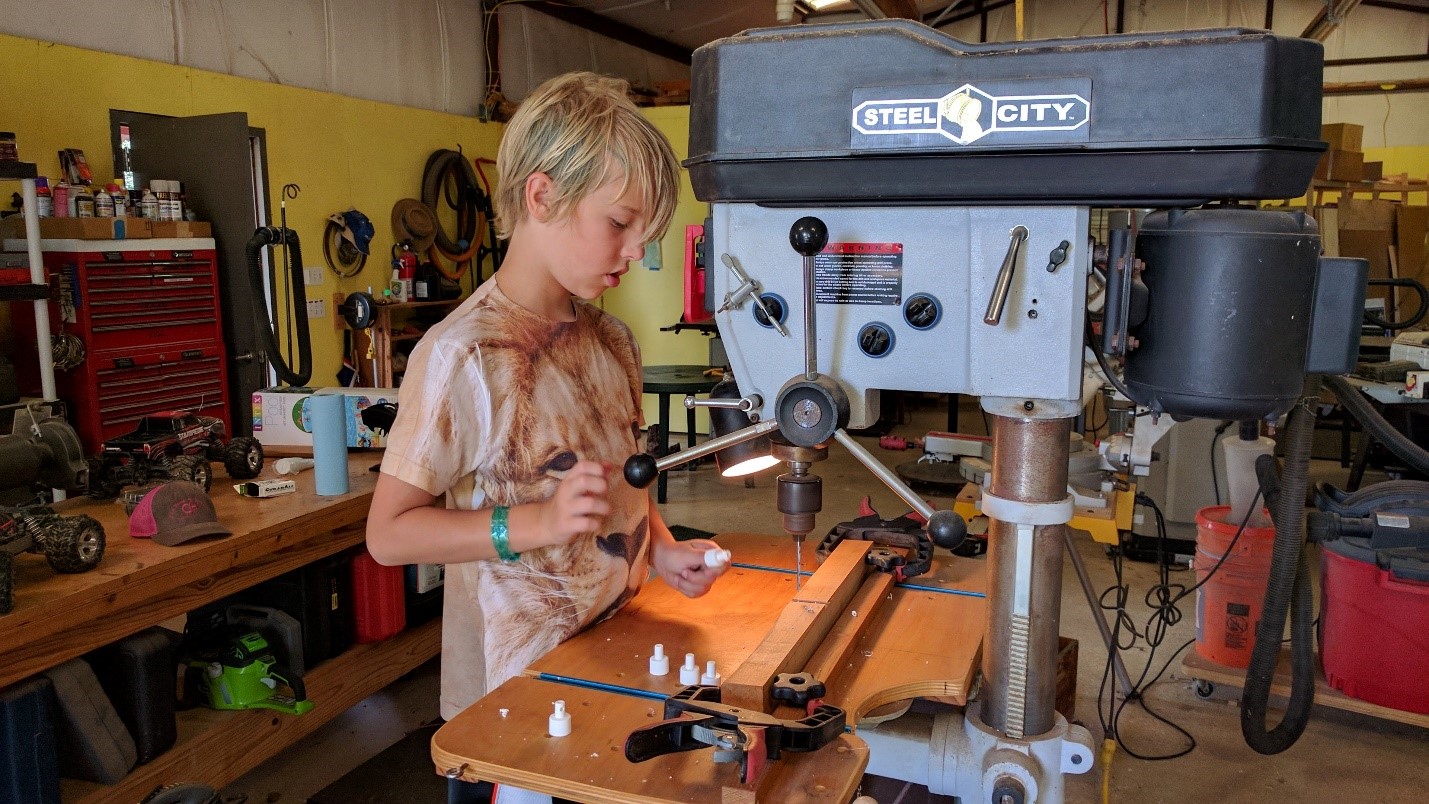
- Assuming that you still have the cap, drill a hole in the cap. Later you will choose ribbons to string through each hole for a hanger. Below, our grandson uses a template for which to drill cap holes in exactly the right place (Figure 1).
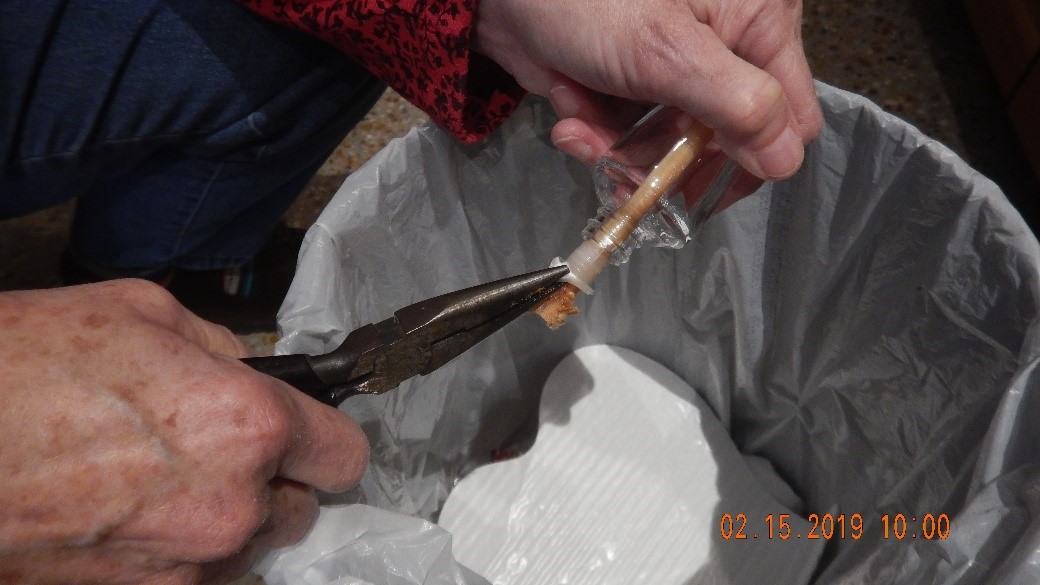
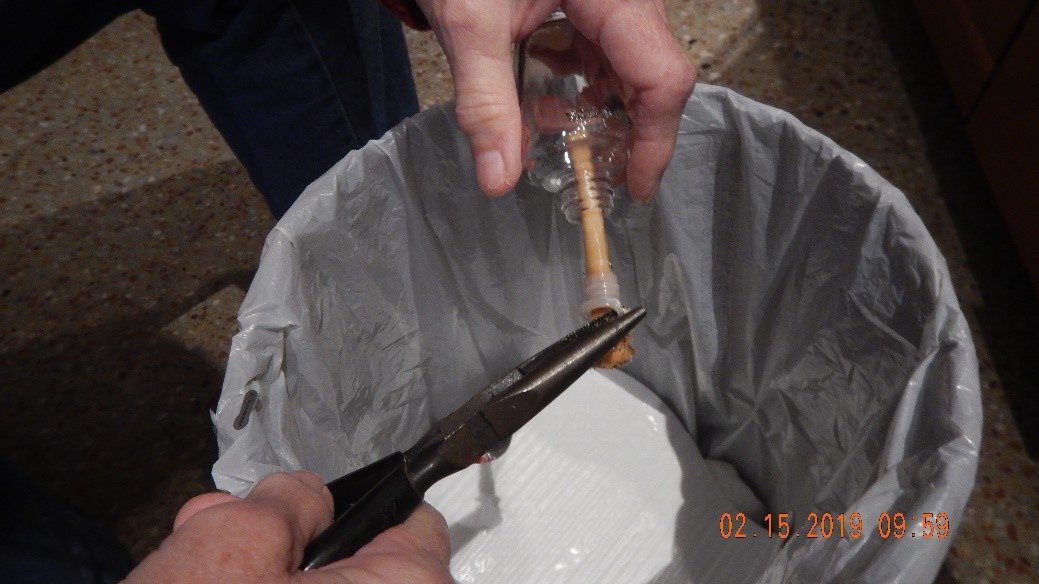
- On the empty bottle, remove any wick with a pair of pliers (Figures 2 and 3 show removal of empty Wallflower bottle wicks).
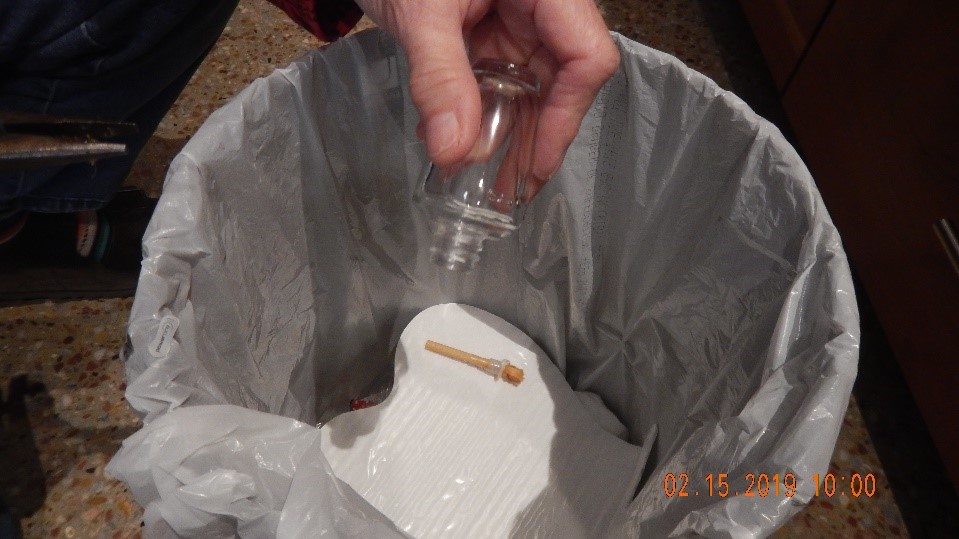
- Make sure no oil remains inside the bottle (Figure 4).
- In hot soapy water thoroughly wash and rinse the bottle. (I even use a tiny brush to thoroughly clean the interior.) Dry the bottle upside down. The drying process can take several days. Mike made drying blocks for us on which to place bottles upside down on old pencils (see Figure 5).
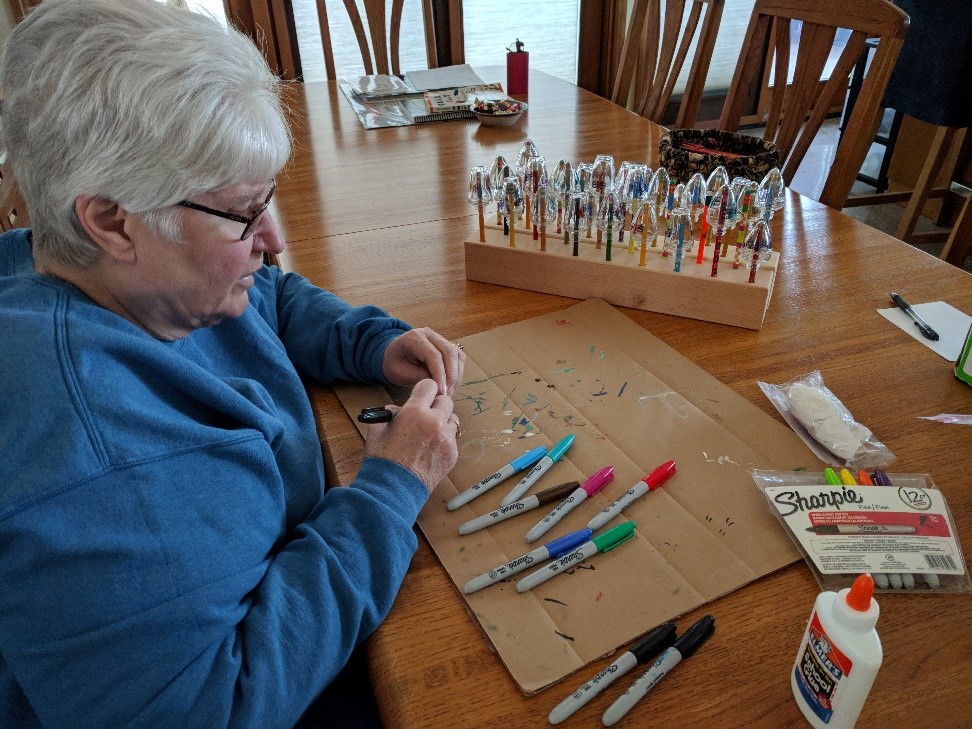
Draw pictures on the glass exteriors with fine tip permanent markers (Figures 5 & 6).

- When pictures are dry, thin some white glue with water and then paint the glue on top of the entire exterior of the bottle (but not on the threads for the cap). Children can help with all parts of this process, as shown by our granddaughter in Figure 7.

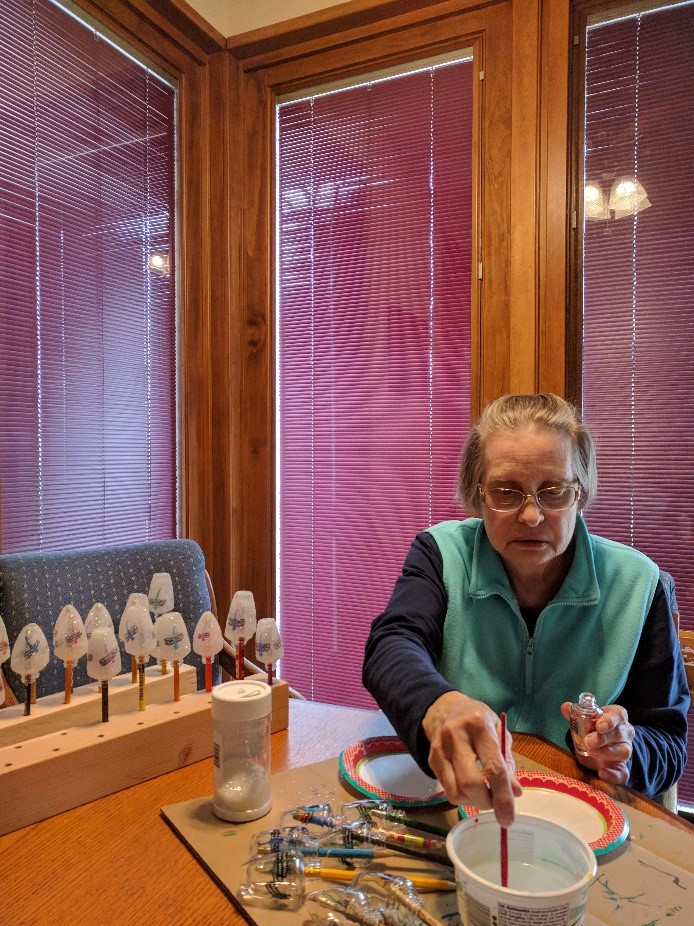
- While each bottle is still wet, sprinkle fine glitter over the wet glue and then place on a drying rack (Figure 8). Figure 9 shows a rack of bottles waiting for the glue and glitter process while finished ones are on another rack.

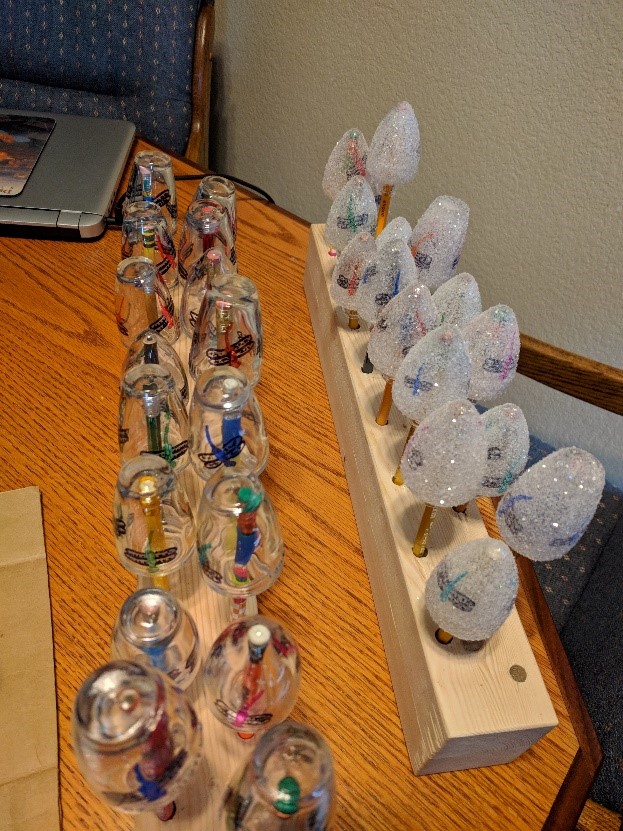
- Place wet glittered bottles on racks to dry overnight. Hint: Lately, I find that gluing and glittering these small bottles is easiest if I hold each on top of its pencil while I work.
Wrap “crystals” in tissue paper to protect them until ready to give them away.
At the library and on Earth Day, we displayed the options on a rack so that children could choose the one they want to take home.

The following are some of the bottles given away at events.
